I've spent the past five years really honing in on a word in my art practice: failure. I've been purposely trying to fail in order to improve my work. Making mistakes make us wiggle and squirm in the studio but they are necessary in order to move forward in our practice. Several choices I've made in my series started out as spectacular failures but turned out to be the turning point in the success of a series.
Small foreclosure boro studies. I used to call them boro but no one knew what that meant.
For the first time in my life I hope not to fail. I've had a bit of a health scare over the past few weeks that has upended our lives in ways I never knew possible. We are still waiting to find out what I have and more than any time in my life, I'm hoping the doctors don't fail me. I realized as I sat with an oncologist (yes, an oncologist) how hard her job must be. She approaches her work completely differently, the absolute goal of not to fail her patients. How hard is that to do? I am in awe of doctors and nurses these days. They have hearts of gold and are just so incredibly amazing. How do they deal with failure?
Progress on the Idiom series. Choosing thread was a major decision!
I am very curious how this life altering change I'm about to go through will affect my work. Will my work become more political, more angry? Will it become more sedate and calm? Maybe I'll just have to try both ways and see which one fails. I look back over all of the work I've done over the past five years and feel like I need to be doing more again. I've had a bit of a slow time in my art while I tend to my life: family, gardening, cooking. And I am passionate about all of those and will not let those go. I would love to be able to combine all of it into my art. Who knows where this path will take me in the next few months but I'll keep you posted. In the meantime, I hope to have some new art to share, perhaps small pieces but an effort nonetheless. Go hug your family and appreciate every second you have.
Oh my how time flies. For eight hours each weekend this month, I've been sewing continuously among new friends at the Kimono Workshop at The Workshop Residence. It's been a drastic change from my usual weekends in Sonoma tending the garden. It felt strange to be in San Francisco on the weekends again.
The Saturday before last was the final session and unfortunately, I wasn't able to stay for the kimono dressing ceremony that evening but hopefully I can link everyone to some pictures soon. However, I will have my very own kimono dressing as I learned that Maki, one of the teachers, happens to live two blocks from me in Sonoma. Very small world indeed!
I can only imagine how much more labor intensive (though gratifying) it is to make a traditional kimono as opposed to our casual yukata we made this month. I have learned so much in this class from ironing to sewing that I never dreamed I could learn. Opening yourself to new ideas can make a world of difference in your creative life. I will never approach sewing the same way again.
And oh my, the tools. The tools are so beautiful. I've become a convert to those japanese sewing shears. They're so much more quick to grab and snip than western style scissors. And the needles we used, all handmade and incredibly sharp, sharp, sharp.
The end of the class was spent learning how to properly iron and fold our yukata for storage. The way it is folded keeps it nice and neat so no need for ironing when you want to wear it.
The folding made a lot of sense as the folds run along the main seams, of which there are six.
Here is what the yukata looks like completed with obi. Gorgeous, no?
Below is a scarf Maki and Tsuyo made for sale The Workshop Residence. It's made with silk and linen and the pattern is by Maki from the last kimono workshop in the spring. I loved this one!
And she made some using a natural linen and silk with the new patterns that were used on our yukata. I think these could be hung as wall art when not worn they're so beautiful! They're $200.00 each and available while they last at The Workshop Residence.
And here is last spring's yukata (men's version) using a cotton naturally dyed with persimmon.
Now back to my regular life again. I'm curious to see how I sew when I pick my 'dress' back up next week.
I just finished my first of three weekends at The Workshop Residence in a Kimono Workshop handstitching a summer yukata. I've written about The Workshop Residence over at Handful of Salt, here. Our hosts are master kimono maker Tsuyo Onodera and her daughter Maki Aizawa. Here was our tool set below. Beautiful, no? The needles are handmade with the tiniest eye holes I've ever encountered and incredibly sharp. Quite a few people broke needles the first day trying to sew. We each had our thimble finger measured and handmade leather thimbles made for us before the class began. I eventually switched back to my old standby which I bought in Japan, it's hard to break a habit!
I knew I would be in for a treat as I'd peeked in on the previous kimono workshop that took place earlier this year. And I knew I would be learning some new techniques but I had no idea how different those techniques would be. It's a whole other way of sewing and approaching pattern making. Below, Tsuyo demonstrates how you measure out the panels for each individual yukata. We worked on four pasic panels this weekend: two front and two back. There were the tiniest measurement variations in all of them to fit our bodies perfectly. A lot of it didn't make sense at first but once the panels started to come together, we had a lot of 'ah ha' moments among us.
Since there are only nineteen hours in the workshop, we're just making a simple yukata which is what you would wear if you stayed in a ryokan or are visiting an onsen. It's a more casual kind of kimono. The colorful summer patterns were designed by Maki and printed by Zoo, Inc. who prints a of lot of fabric for The Workshop Residence. It was hard to choose a colorwave! One of the more exciting discoveries for me was the use of a tiny iron to make markings in the fabric. No tailor's chalk, no fading ink, just lines pressed with a sharp, hot iron point. I have to find one of these! The lines last for days and go through four layers of fabric. All measurements are in metric so we had to brush off our school brains and remember how much easier it is then the imperial system. The fabric in the foreground below is my colorwave choice, yellow and grey.
Day one of the workshop had us sewing the four main panels together, along with the okumi that attach to the front panels. A lot of us had a little homework that night to catch up. Tsuyo demonstrated her sewing technique to us before we started and I was completely floored. Just watch this video and you'll see what I mean. I can't even come close to mastering this.
Day two consisted of Tsuyo checking our work, including finishing off our main panels and okumi before moving onto sewing the sleeves. It was quiet at times while we furiously sewed but the mood was casual and fun. Some students had never sewed before and some had some experience. We were all on the same level in this class, learning such a new technique.
At the end of the second day, we started in on the sleeves. The basic sleeves are below and what looked like a simple sewing job was a challenge at first. All of the lengths of stitching is done with a single piece of thread, no knots and start overs halfway through so you had to make sure you had enough thread before you started. The sleeves had a single thread that turned 90 degrees with backstitching halfway so you had to remember to push your fabric to the end to avoid bunching before you backstitched or you had to start over.
There was a lot of millimeter and centermeter measurements that made sense once we started. Tyuyo demonstrates the final stitching below for a sleeve: at 21 cm from the top of the sleeve, 3 backstitches at 8mm, 3 backstitches at 9mm and then three backstitches at 1 cm to secure the sleeve opening. Such detail!
We sewed all of the hidden stitches for the first two days to give us some practice for what was to come next: the top stitching to be done at home during the week, eek! I snapped a few photos of the finished yukata example to help me figure it all out!
This is where you can really be creative, choosing a topstitch thread color. Look at those stitches, perfect! I know I can make a pretty top stitch when I'm working from the top but on some of these stitches, we'll be working from the back, in reverse, so I better up the quality on the backside of my stitches fast or this is going to look bad!
I choose a dark blue/turqoise thread as a top stitch, very high contrast with the white, grey and yellow. Wish me luck! Next weekend we will attach the sleeves, add more top stitching, finish the waistband or obi and make a collar. A lot more to do! In the meantime, if you're in the San Francisco Bay Area, stop by Thursday night, November 14th from 6 to 7:30 at The Workshop Residence to hear Tsuyo speak about her experience as a kimono teacher for the past fifty years in Sendai. Yes, that's right, Sendai. Go here for more information. Learn more about The Senninbari Project that Maki started with her mother here. It is a sewing collective of women in Tohoku, Japan who lost their homes and livelihoods to the tsunami of 2011.
Over the past month I've been processing all of the sewing I did over the summer into a new piece. I'm working on a dress, but not an ordinary dress. This one is made up of sixty four pieces of clothing. These sixty four castoffs (from my and my friend's closests) represent the amount of clothing that the average American purchases every year. I learned this little fact from reading Overdressed: The Shockingly High Cost of Cheap Fashion by Elizabeth Cline. Ponder this for a moment. That's over one new article of clothing a week. Really? It's hard to visualize, no? Hopefully, this dress will help us see it for what it is.
The images show only twelve pieces of clothing at this stage, a far cry from sixty four. And yes, that will be some train coming off the back.
Most of us are guilty of buying a lot clothes these days, myself included. It took me an entire year to figure out why I wasn't wearing half the clothes in my closet. It's because after one wash, they never look as good as they did on the rack. In fact, they look terrible. Oh yeah, it's because they're cheaply made! So the clothing languishes in my closet, unworn.
This dress also won't be worn, unless I want to break my back wearing it. But, hopefully, it will make a statement about how much we're wasting with the 'fast fashion' movement. We will be able to see it with our own eyes.
And now I need to come up with a name for the dress or, perhaps the project, if it turns into one. I ponder that as I sew it together. Yes, I'm handsewing it. With a visible, bright red thread, of course.
I've been so busy the last few weeks I didn't even remember the last time I posted here. At least I left the blog with some lovely eye candy. I'm also behind in updating my current exhibition schedule so here we go. Currently, the Foreclosure Quilts are spread across the U.S. Here's a little info on each show:
Unbound: Quilters and Artists Redefine Quilts, September 11 through November 5. Hollister Gallery, Babson College, Babson Park, Massachusetts. For all of you east coasters, this should be a wonderful show, especially if you're interested in quilts. Be sure to check it out before it closes. I was only able to spare one quilt for the duration of the show but it's my latest one, Miami. My, have I even shared Miami with you yet?? Once I have it back, I'll take some better photos and repost them.
Miami Foreclosure Quilt, 2013.
Material Witness, September 26 through November 15th. Dalton Gallery at Agnes Scott College, Atlanta, Georgia. I have a great story to go with this gallery. My late aunt, Louisa McIntosh, owned the McIntosh Gallery in Atlanta. (Yes, I'm a Southerner and yes, my maiden name was McIntosh - why did I give that up!) When I was thirteen, I had such a memorable experience visiting the gallery for the first time. Something I had been studying in art class at school was expressed in a painting on her gallery walls. There was a click that went off in my head that said "You need to be an artist when you grow up." I even made my dad take a picture of the moment. She attended Agnes Scott College so it is like full circle to exhibit my work here. I have two quilts in the show: Albuquerque and Riverside.
Albuquerque Foreclosure Quilt, 2011.
SPRAWL, October 4 through January 5, 2014. Houston Center for Contemporary Craft, Houston, Texas. This looks like such an exciting show and I'm thrilled that when you hit HCCC's main website, you're hit with a picture of the Chicago quilt. I have three quilts in this exhibition: Chicago, Detroit and Cape Coral.
Detail of the Chicago Foreclosure Quilt, 2013.
And there's more coming soon! I can't believe how these quilts have taken on a life of their own. One of the quilts will be in an exhibtion in St. Louis in February and for all you Bay Area people, I will finally have a solo show in Santa Cruz in February. More details on these coming soon. In the meantime, you'll see what I've been up to in the next few posts. All good, just not enough time to sit down and type these days! Happy Friday!
Perhaps Daniela Gregis is more of a fashion designer than an artist but as you can see, her clothing designs are pure A R T!
Image from www.firstVIEW.com
A love of natural fabrics, linens and such and a love of color and pattern play drew me in immediately when I came across her work on Pinterest.
Image from www.fasionising.com
For the Spring/Summer 2013 collection, Daniela Gregis writes this. Perfectly written.
Simply mint and lemon ... or the opposite, many times together ... as a meadow
under the sun where you look around,dreams , and you get lost,
look down and start counting: primrose, buttercup, poppy, rosemary, forget-me, sage, ...
Once I started to delve deeper into her work, I discovered just how conceptual the clothing can be. In an interview I came across online, Gregis said "My deepest desire was to recover the lost
arts as crochet or embroidery. I dreamed of reviving them in a modern way,
mixing ancient tradition to contemporary shapes and patterns."
Image from www.firstVIEW.com
Often, the clothing can be transformed into something like a tablecloth. She mentions how she saves every scrap of cloth from previous cuttings. "Even a square centimeter can be the starting
point of a new dress."
Needless to say her clothing has inspired me like crazy this summer. It reminds me to play and have some fun with fabric. I mean it's only fabric, right?!
Image from www.firstVIEW.com
Be sure to browse Daniela Gregis's website. And Kristina Bergman has two amazing Pinterest boards here and here about the clothing. And see my little Pinterest inspiration board here. Enjoy!
Something magical happened this year. I met an amazing author named Laura Gottesdiener. Many months ago, she contacted me to tell me she was writing a book about the Foreclosure crisis and had happened upon my Foreclosure Quilts. She wanted to find some way to include my artwork in the book she was writing entitled A Dream Foreclosed: Black America and the Fight for a Place to Call Home. I was beyond flattered and so happy to hear that there was someone out there writing the words to what I was showing visually with my quilts. This is a story that needs to be heard and I couldn't imagine a better person to write it.
A few weeks ago, Laura let me know that the book is now available in print through Zuccotti Park Press here. It's even on Amazon where there are numerous impressive editorial reviews. The editors at Zuccotti were going to use just one quilt image at first, but eventually they decided to intersperse several of them throughout the book (I don't have my copy in hand yet but it's on its' way!)
And now you can hear Laura speak about her work, and a sweet mention about the quilts on Democracy Now! What a compelling interview. I feel so incredibly honored to have my work alongside Laura's writing. And better yet, let's hope this book really makes an impact on spreading the hidden stories behind the foreclosure crisis. Share this post and please spread the word about this book. We need more writers like Laura!
It has been SO long since I featured an artist on my blog so it's time to rectify that! I'm sharing the work of Batia Sofer today, an artist who lives in Motza Illit near Jerusalem.
Cloak. Acrylic, Gold Leaf, Gauze Pad on greenhouse netting Embroidery Thread. 155x130 cm, 2013
Incredible, beautiful work, isn't it? She utilizes natural materials that have a wonderful texture and earthiness to them. Found pieces come together to tell a myriad of stories.
Three Figures. Acrylic, Mineral Plaster, Masking Tape , Gold Leaf on Jute Embroidery Thread. 104x184 cm, 2012
These pieces are from her Ancient Dreams series which she has been making since 2009.
Cactus - Bird. Acrylic , Masking Tape , Gold Leaf on greenhouse netting,Embroidery Thread. 88x128 cm, 2013
Her artist statement about the series:
"For as long as I can remember, I have always been attracted to primitive tribe culture, the significance of the tribal ceremonies and their visual expression.
These cultures are characterized with special colors, various textures, with strong elements, and simple unsophisticated techniques. In my initial works in the studio I sought out material whose texture was grainy and coarse; material which resembled earth and reverberated the materials which were used by the ancient tribal cultures."
Batia Sofer
Two Headed Animal. Acrylic, Mineral Plaster , Masking Tape, Gold Leaf and
Palm Fronds on Jute, Embroidery Thread. 103x120 cm, 2012
See more of her work on her website. Be sure to look through her earlier series entitled Childhood Landscape that reflects her life growing up on a kibbutz. Fascinating images.
Uh oh, I think I like my summer studio better than my San Francisco studio. Even though it's probably half the size, the new space is brighter and definitely warmer! After being in the same studio in San Francisco for fifteen years, my usual studio is clearly in need of a deep clean. One thing that will be moving back with me is my new sewing machine!
After hearing numerous snickers about my old machines and having a particularly frustrating day that involved two types of screwdrivers being used multiple times within two hours, I gave up on my old machines. I was digging around for an old one on Craigslist but came up empty. Then I started thinking about how every place I'd been recently had a Juki. Little did I realize they made home machines as well. I didn't need anything as fancy as a Bernina (nor could I fork over the money) so I thought I'd give this one a shot. Not too expensive but does everything I've been wanting for years. Feed dogs that lower, reverse stitch that works, I can even put through more than three layers of fabric without the needle getting stuck. Yes, I had it bad before which may explain why I hand-sewed all of those quilts!
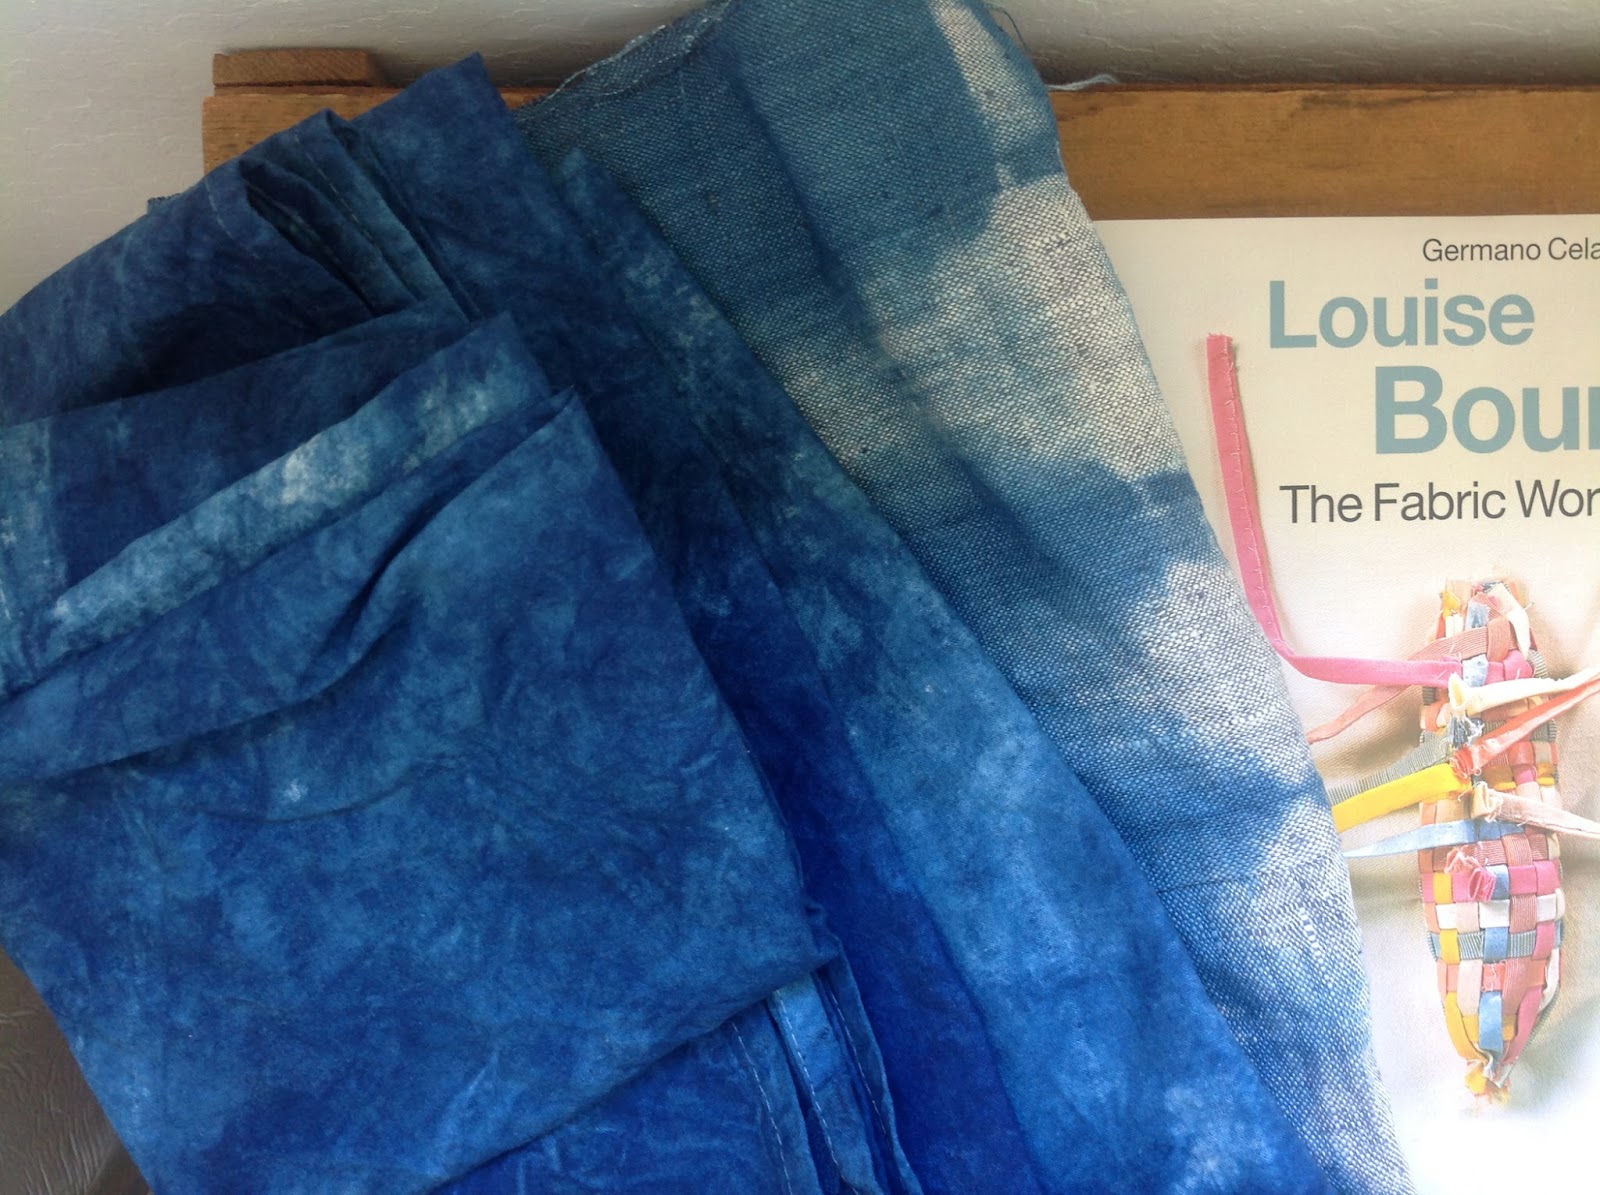
And now I'm eager to tackle the indigo fabric I made recently. Not sure what I'll do with it but Louise Bourgeois has one amazing piece that I've fallen hard for.
Lots of ideas flowing. I promised myself that I would just play a bit this summer and not focus in on anything in particular ... yet. First, there's the book. Everyone at the indigo weekend fell for it, hard. It's worth every penny. I've also been spending too much time on Pinterest. Check out my summer smock inspiration board. I've also been making smocks, dresses and playing with a lot of color.
This dress came from a pattern I made from an existing dress. And that hot pink? I ordered some remnant wool felt from Filzfelt to play with. Yes, I'm thinking about a new series but I'm not committing yet.
We'll see what the next few weeks in the summer studio bring. In the meantime, there's a whole lot of produce to harvest and process just outside the studio door.
You won't see any of that growing in San Francisco!
I just had the highlight of my summer in Sonoma last weekend. My talented friends Myrna, Katrina, Sonya, Patty, Shelly, ReCheng and Neiley drove up to the wine country to spend the weekend with me indigo dyeing fabric, paper and even a few ceramics.
Last summer I took a five week indigo dyeing class with Barbara Shapiro. I left the class with a wonderful recipe for a Greener Indigo formula. The best part of the vat is that it is ecologically sensitive and has no fumes. It's also really easy to start and to manage. We left the class with several useful handouts and a lot of dyed fabric. Take Barbara's class or workshop and you'll have access to her recipe which is derived from Michel Garcia's indigo formula. Starting the vat was WAY easier than I imagined. Well, at least once I learned how to read a ph test strip accurately!
On Saturday morning, seven lovely ladies arrived with piles of fabric to experiment with.
We spent the morning clamping, tying and bundling and dropped our fabric into a Synthropol solution (another bonus, no pre-mordanting!) to soak while we enjoyed a potluck lunch with some of my Southern iced tea.
After lunch we got to dyeing!
We pulled our fabric from soaking (there was a lot of awesome fabric in the mix).
Let me tell you this vat was potent which was good because we dyed a lot of fabric! Everyone's personality came through, some people with very controlled results.
And some with looser styles.
Meanwhile all of our kids ran amuk in the yard, picking ripe grapes and green beans to their hearts content.
After two days of many, many dippings the vat seemed exhausted until my friend Shelly told me to test the ph and just add more indigo to it. I did and the next day it was going again, like magic!
What a weekend! I plan to do it again and likely before summer ends as the vat does best at 82 degrees. The temperature on Saturday was exactly 82 degrees! How perfect was that?!